How to Compile and Sign OS X Project for Independent Distribution
This article describes how to obtain project codes from GitHub, compile and sign the application for an independent distribution outside the App Store, and pack the application using NavX OS X project example.
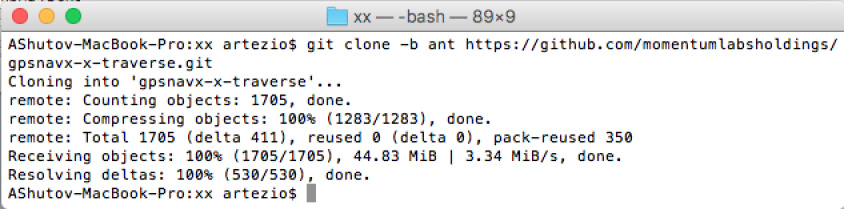
Step 1. Receive the source codes from Git.
The source codes are available at the link from the ant branch of the gosnavx-x-tarverse project: https://github.com/momentumlabsholdings/gpsnavx-x-traverse/tree/ant

You can download the project from the link or clone to the current folder with the git command: git clone –b ant https://github.com/momentumlabsholdings/gpsnavx-x-traverse.git
Step 2. Launch XCode
The project should be launched with the workspace file NavX.xcworkspace in the gpsnavx-x-traverse/x-traverse folder

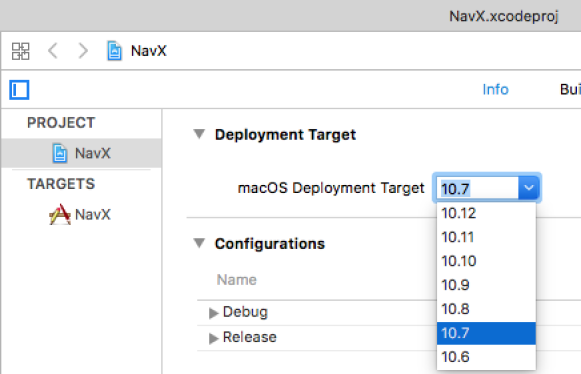
Optional: Reconfigure
The current version of the project is configured for the OS X 10.7 target using libraries from pod.
The 10.7 version is a minimal version for CocoaLumberjack and Crashlytics packages.
To use the 10.7 version we needed to replace the SSL version with the old library SSL 0.9.7.
The newest stable version of SSL can be loaded from pod, but the version is available for target OS X 10.9 and higher.
To use the newest version take the following steps:
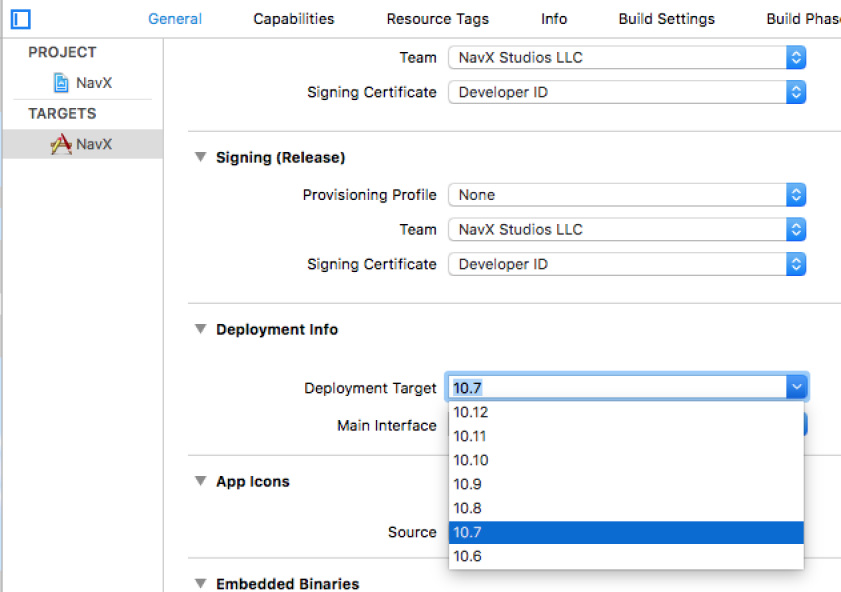
Change the Deployment target version of the NavX project and in the Targets:
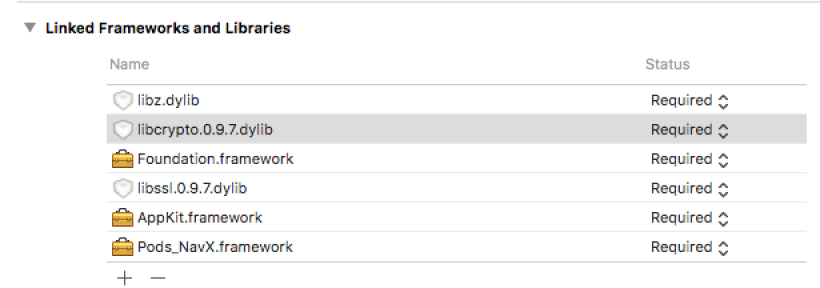
1. Remove old SSL-libraries (libcrypto.0.9.7.dylib and libssl.0.9.7.dylib) from the Targets:
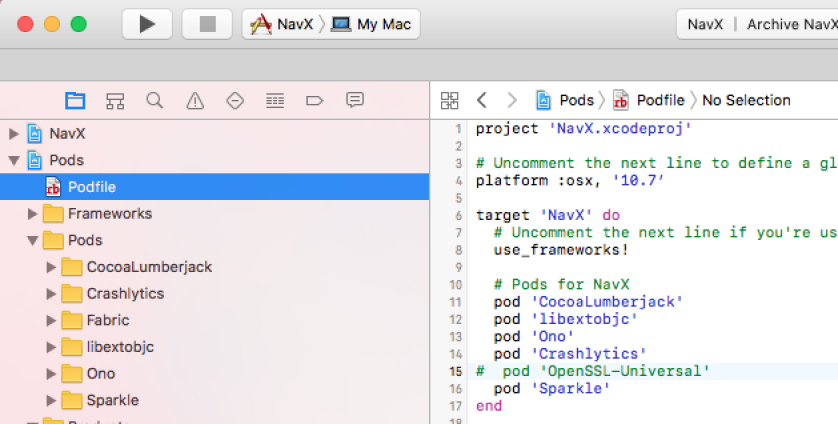
2. Edit the Podfile – change OS X version in the “platform :osx, ‘10.7’” string and uncomment the “# pod ‘OpenSSL-Universal’” string:
3. Close XCode.
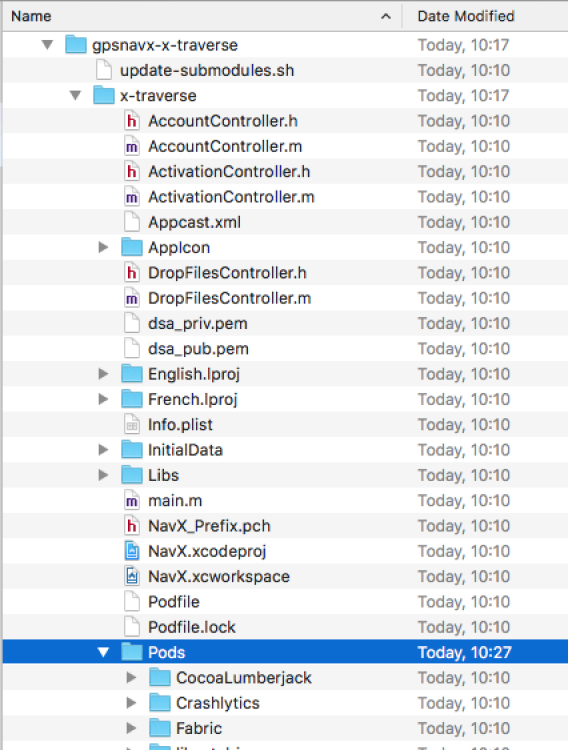
4. You can remove the Pods folder (with Podfile.lock) if you want to update all pod packages:
5. Start the Terminal, change directory to the the x-travese folder, and execute the next command: install pod with the command, download and update pod-packages. After processing the command, you will be able to open XCode again.
Step 3. Compile for Signing.
If you want to compile and sign the project package for an independent distribution, you must be an Apple Development Team Agent to receive the Developer ID and the Developer ID Installer certificates. (See https://developer.apple.com/library/content/documentation/IDEs/Conceptual
/AppDistributionGuide/MaintainingCertificates/MaintainingCertificates.html#//apple_ref/doc/uid/TP40012582-CH31-SW32). You can generate the certificates with the XCode:
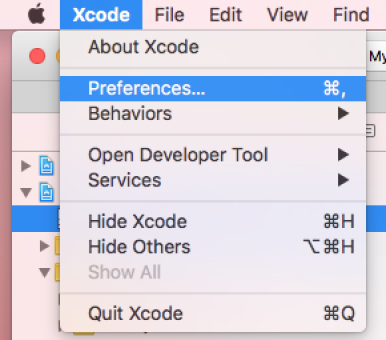
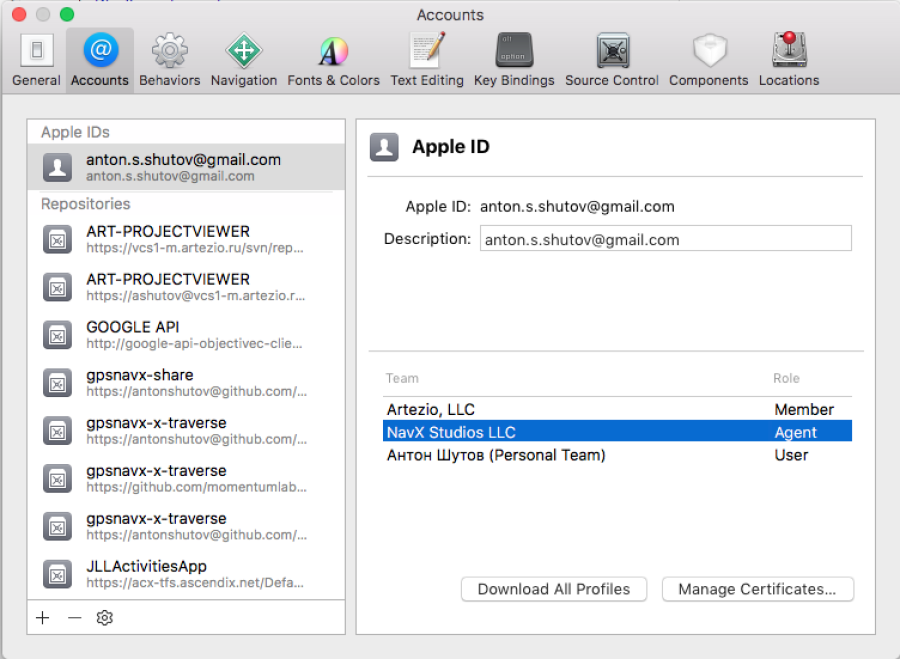
1. Open XCode/Preferences…:
2. Select Accounts Tab, your account, and a team in which you are a Team Agent:
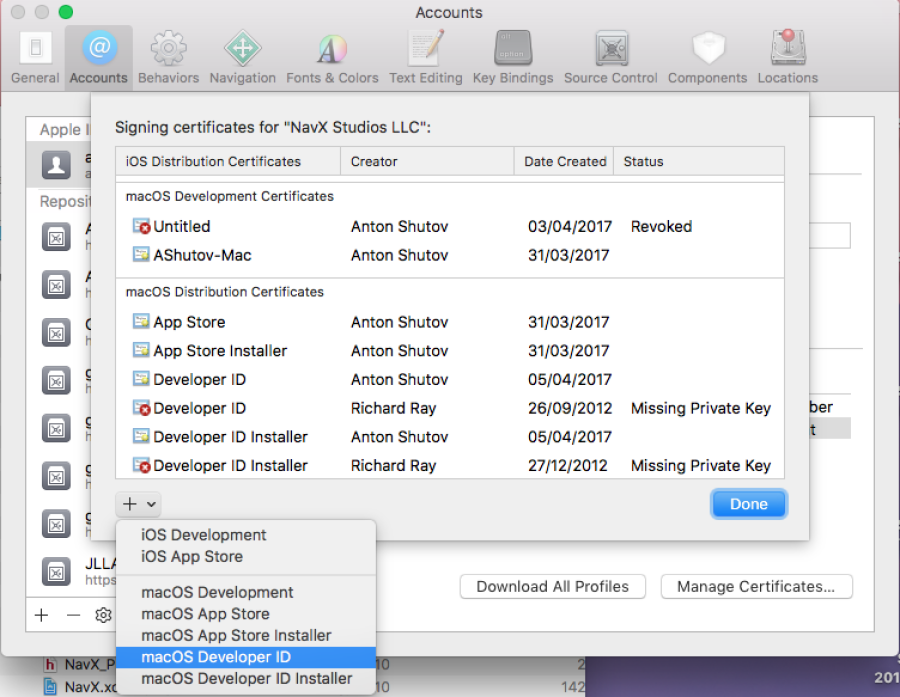
3. Press “Manage Certificates…” button and add the Developer ID and the Developer ID Install certificates if you don’t have the certificates or they have expired:
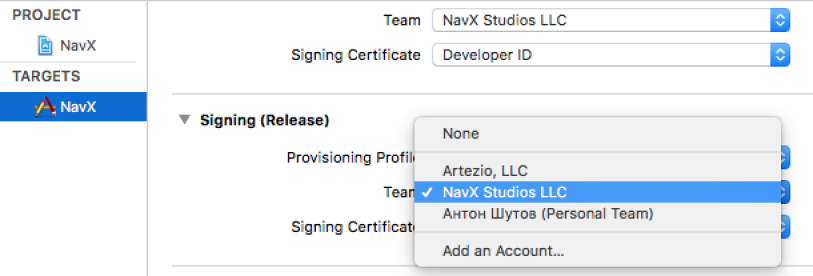
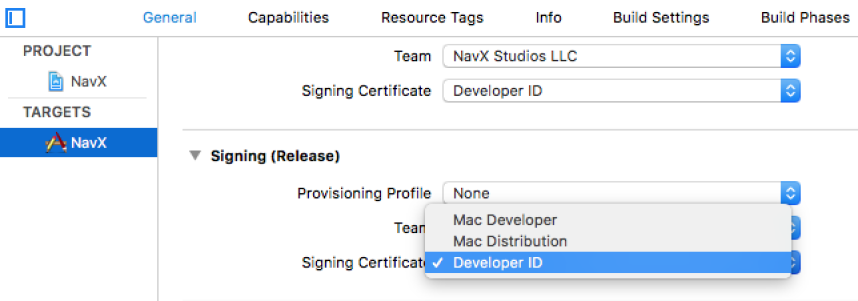
4. Configure the project target for signing – set the Team and the Signing Certificate options for Release:
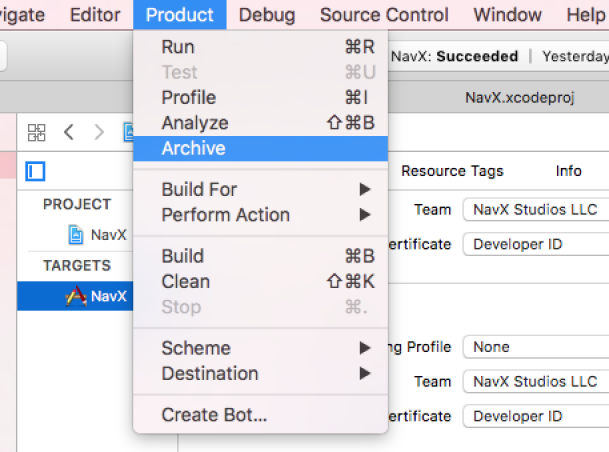
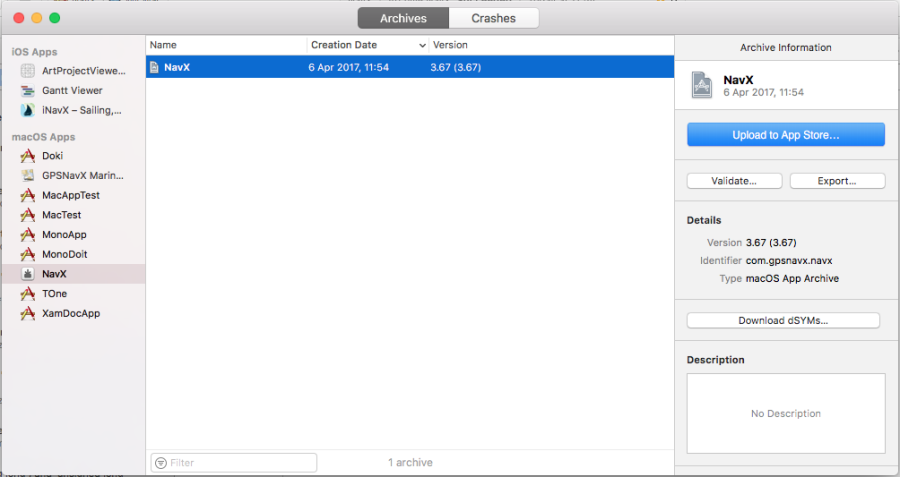
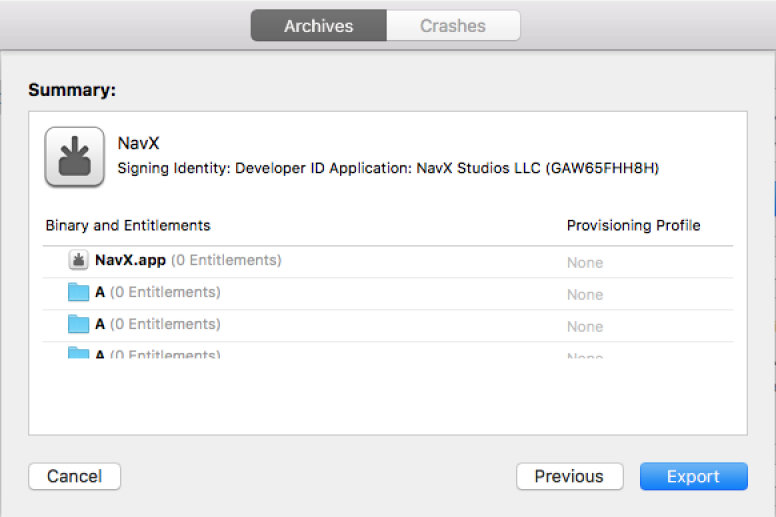
5. Archive the project:
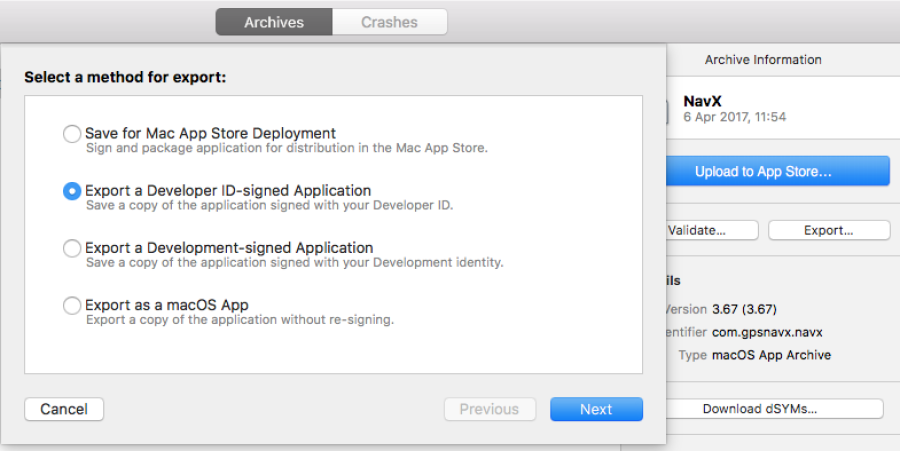
6. Press the “Exports…” button and select “Export a Developer ID-signed Application”, press “Next” button:
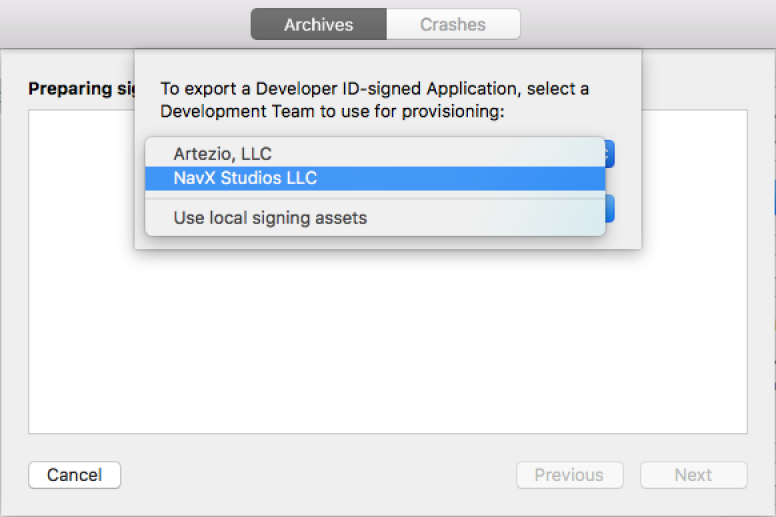
7. Select the Team:
8. Press the “Export” button:
9. Select a folder and folder name for the resulted application and press the “Export” button:
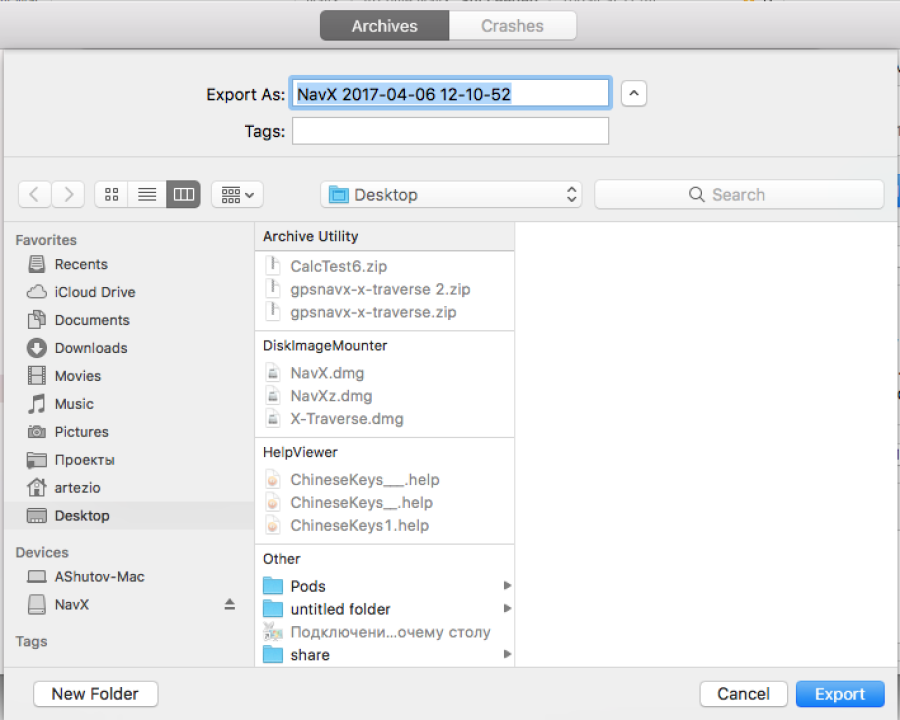
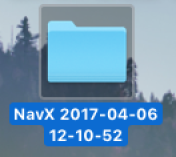
(It will be good if you export the application into NavX name or rename the folder later).
10. Open the Terminal and change directory into the resulted NavX folder.
11. Execute the next command productbuild –component NavX.app /Applications –sign “Developer ID Installer:” NavX.pkg
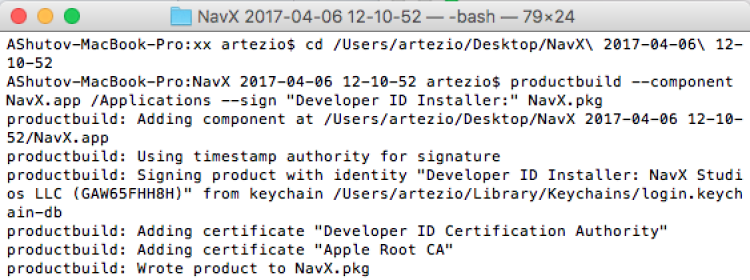
The resulting NavX.pkg file is distribution ready.
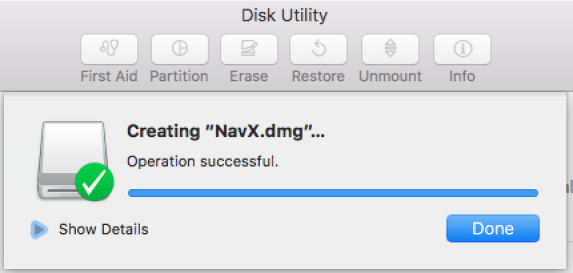
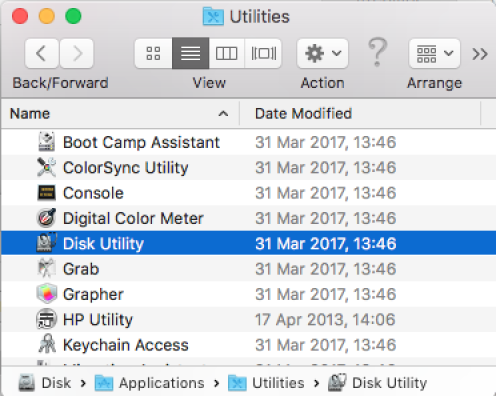
Step 4. Create DMG image
1. Remove the NavX application (not NavX.pkg !) and add a readme.txt file.
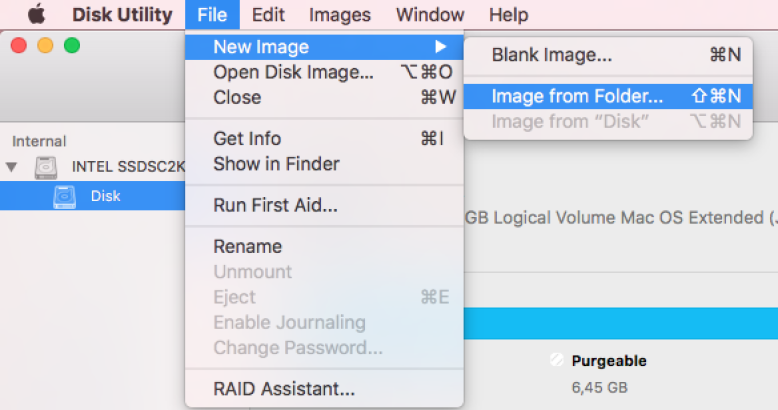
2. Launch the Disk Utility application from the Utility:
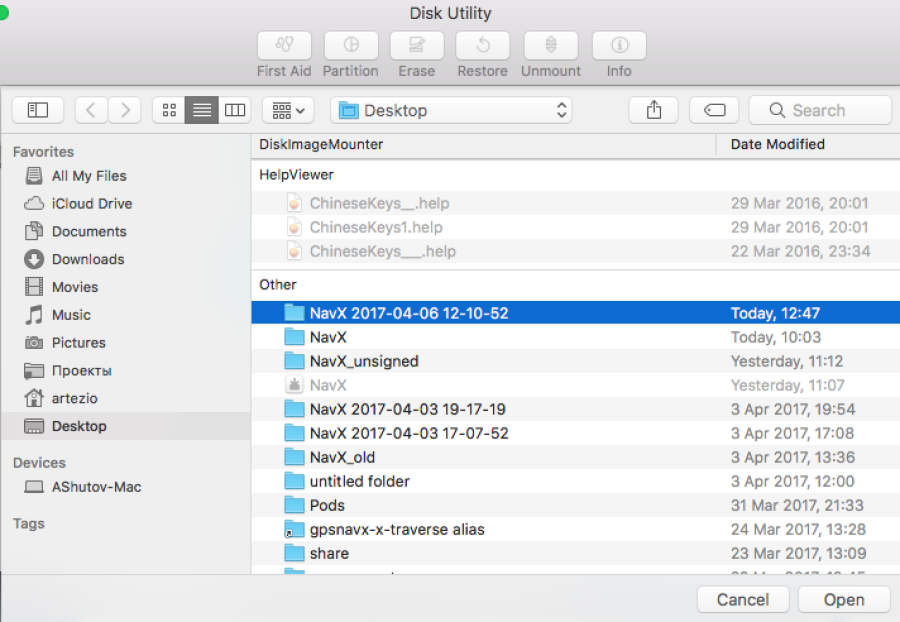
3. Create the DMG image from the folder:
4. Select folder for the image:
5. Edit or enter the image name and select the target folder:
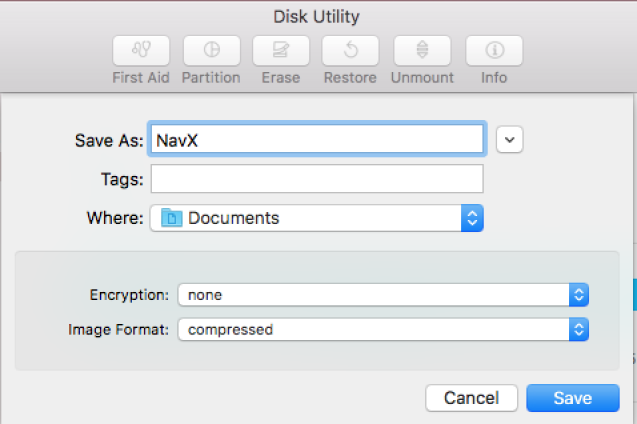
6. The resulted NavX.dmg will be available in a while in the selected target folder: